Spring Boot 配置多 Profile 的方式
原创2019/4/17大约 3 分钟
Spring Boot 配置多 Profile 的方式
把环境信息配置在不同的配置文件中,在编译打包时加载不同的配置文件即可
1、方式一
1.1、创建多个配置文件
application.properties:
spring.profiles.active=@profileActive@application-dev.properties:
test.name=vermouth.dev
test.age=18.dev
application-prod.properties:
test.name=sherry.prod
test.age=20.dev
1.2、修改 pom 文件
<?xml version="1.0"encoding="utf-8"?>
<project xmlns="http://maven.apache.org/POM/4.0.0"
	xmlns:xsi="http://www.w3.org/2001/XMLSchema-instance"
	xsi:schemaLocation="http://maven.apache.org/POM/4.0.0 http://maven.apache.org/xsd/maven-4.0.0.xsd">

	<groupId>com.example</groupId>
	<artifactId>demo</artifactId>
	<version>0.0.1-SNAPSHOT</version>
	<packaging>jar</packaging>

	<!-- 省略其他配置 -->

	<build>
		<plugins>
			<plugin>
				<groupId>org.springframework.boot</groupId>
				<artifactId>spring-boot-maven-plugin</artifactId>
			</plugin>
		</plugins>
		<resources>
			<resource>
				<directory>src/main/resources</directory>
				<excludes>
					<exclude>application*.properties</exclude>
				</excludes>
			</resource>
			<resource>
				<directory>src/main/resources</directory>
				<filtering>true</filtering>
				<!--根据打包时激活的profile来包括对应的配置文件 -->
				<includes>
					<include>application.properties</include>
					<include>application-${profileActive}.properties</include>
				</includes>
			</resource>
		</resources>
	</build>
	<profiles>
		<profile>
			<id>dev</id>
			<activation>
				<activeByDefault>true</activeByDefault>
			</activation>
			<properties>
				<profileActive>dev</profileActive>
			</properties>
		</profile>
		<profile>
			<id>prod</id>
			<properties>
				<profileActive>prod</profileActive>
			</properties>
		</profile>
	</profiles>
</project>
1.3、打包
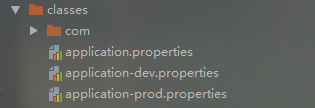
mvn clean package -P prod如图所示,打包后就只加载了 application.properties 和 application-prod.properties。

打包后的 application.properties 中:
spring.profiles.active=prod2、方式二
把环境信息配置在不同的配置文件中,同时在 application.properties 中使用占位符,再编译打包时动态地把那些占位符替换掉。
2.1、创建多个配置文件
appication.properties:
test.name=@name@            # spring boot的application.properties中的默认占位符是@..@
test.age=${age}             # 这个占位符可以通过在pom.xml中配置来使用
application-dev.properties
name=vermouth.dev
age=18.dev
application-prod.properties
name=sherry.prod
age=20.prod
2.2、修改 pom 文件
<?xml version="1.0"encoding="UTF-8"?>
<project xmlns="http://maven.apache.org/POM/4.0.0"
	xmlns:xsi="http://www.w3.org/2001/XMLSchema-instance"
	xsi:schemaLocation="http://maven.apache.org/POM/4.0.0 http://maven.apache.org/xsd/maven-4.0.0.xsd">
	<modelVersion>4.0.0</modelVersion>

	<groupId>com.example</groupId>
	<artifactId>demo</artifactId>
	<version>0.0.1-SNAPSHOT</version>
	<packaging>jar</packaging>

	<name>demo</name>
	<description>Demo project for Spring Boot</description>

	<parent>
		<groupId>org.springframework.boot</groupId>
		<artifactId>spring-boot-starter-parent</artifactId>
		<version>2.0.3.RELEASE</version>
		<relativePath /><!--lookup parent from repository -->
	</parent>

	<!--省略 -->

	<profiles>
		<profile>
			<id>prod</id>
			<properties>
				<build.profile.id>prod</build.profile.id>
			</properties>
		</profile>
		<profile>
			<id>dev</id>
			<activation>
				<activeByDefault>true</activeByDefault>
			</activation>
			<properties>
				<build.profile.id>dev</build.profile.id>
			</properties>
		</profile>
	</profiles>

	<build>
		<filters>
			<!--filter中的文件表示替换源,即用这里面的文件中的value值替换那些占位符 -->
			<!--如果filters中有多个filter,且这些filter中有相同的key,则后面的filter中的value值为最终值 -->
			<filter>${basedir}/src/main/resources/application-${build.profile.id}.properties</filter>
		</filters>

		<resources>
			<resource>
				<filtering>true</filtering><!--这个表示对src/main/resources中的配置文件中的占位符进行动态替换 -->
				<directory>src/main/resources</directory>
			</resource>
		</resources>
		<plugins>
			<plugin>
				<groupId>org.springframework.boot</groupId>
				<artifactId>spring-boot-maven-plugin</artifactId>
			</plugin>
			<plugin>
				<groupId>org.apache.maven.plugins</groupId>
				<artifactId>maven-resources-plugin</artifactId>
				<configuration>
					<delimiters>
						<!--使用${..}作为占位符 -->
						<delimiter>${*}</delimiter>
					</delimiters>
					<!--使用默认的占位符(@..@) -->
					<useDefaultDelimiters>true</useDefaultDelimiters>
				</configuration>
			</plugin>
		</plugins>
	</build>
</project>
2.3、打包
mvn clean package -P prod如图所示,打包后依然会加载所有环境的配置文件:
打包后的 application.properties 中:
test.name=sherry.prod
test.age=20.prod
3、方式三
无需额外配置,在启动 jar 包时指定环境参数,同打包编译方式不同,属于一次性的指定。
假设当前存在
application.yml、application-dev.yml、application-prod.yml文件
在 application.yml 配置:
spring:
  profiles:
    active: dev
...
启动 jar 包:
# 指定本程序参数
java -jar demo.jar --spring.profiles.active=dev
或
# 指定虚拟机参数
java -jar demo.jar -Dspring.profiles.active=dev